Showing posts with label wearables. Show all posts

Tuesday, December 30, 2014

Vests and jackets and shawls, oh my! (Czech folk costumes, Musaion)


As I mentioned previously, the Musaion in Prague had quite an extensive collection of Czech folk costumes (see my earlier posts here, here, and here).  In this post I'll include photos of individual garments and accessories from the Musaion collection.  (You can click on the photos to enlarge them, if desired. My apologies for the poor quality of some of the photos -- what with low lighting and reflections from the glass, it's hard to get good photos in museums, at times.)

Thursday, December 11, 2014

Czech out these hats! (Musaion, Prague)

As I mentioned in an earlier post, I have a bit of an obsession with hats, so I took photos of some of the Czech hats at the Musaion (Ethnographic Museum) in Prague.  (My apologies for the terrible pun in the title of this post -- I blame the t-shirts we saw in Prague emblazoned with "Czech this out!")

(Note that you can click on any of the photos to enlarge them.)


Here is a closeup of one of the hats in the wedding tableau (you can see the whole tableau in the photos at the end of my previous post). Isn't it wonderful? I love the tiny size and the elaborate interweaving of ribbon and beadwork.  I so want a hat like this -- although I know it would look ridiculous on me.  The shiny beads and ribbon remind me of some of the Polish hats I saw at the Ethnographic Museum

Wednesday, December 10, 2014

Czech Folk Costumes (Musaion, Prague)


The Musaion (Ethnographic Museum) in Prague has an extensive collection of Czech folk costumes dispersed through a number of different rooms and display cases. It was interesting to see the similarities and differences from the Polish folk costumes at the Ethnographic Museum in Kraków.  I also found a list of the key differences between Czech and Slovak costumes here -- number 13 on the list is "If woman has a really giant bow attached to her head, it’s Czech."  Note the enormous bow on the costume pictured above.

I love the fanciful quality of design lines that extend well beyond the frame of the body.  It looks as if she could fly away on the first stiff wind.   Or maybe the bow can become a propeller and she just skims along the ground like a low-flying helicopter.  

(Remember that you can click on the photos to enlarge them, if desired.)

Monday, November 17, 2014

Czech Holiday Costumes & Customs (Musaion, Prague)

In addition to showing folk art, costumes and tools, the Musaion (Ethnographic Museum) also had exhibits related to the major religious holidays. Many of the costumes and practices were derived from pre-Christian traditions, including themes of nature and respect for ancestors.  The signage at the museum didn't include specific details about the particular costumes, so I did a bit of internet research and turned up a number of unusual Czech folk traditions. 


Sunday, November 16, 2014

Petřín Hill and the Musaion (Prague, Czech Republic)


Lego Museum

On our fifth day in Prague, we walked to Petřín Hill, a large public park. On our way, we looked in at the Lego Museum. While we didn't actually go in to see the museum exhibits, we ogled the Lego kits in the shop and admired this mural, made entirely of Legos. 

View from the Legion Bridge (Most Legií) over the Vlatava River

On our way to Petřín Hill, we crossed over the river via the Legion Bridge, which was virtually empty of pedestrians (compared to the crush of the Charles Bridge). This photo is looking toward the Charles Bridge.  You can see beautiful pictures of the Legion Bridge here.

Tuesday, November 4, 2014

Hats! at the Ethnographic Museum in Kraków


As I perused the folk costumes at the Ethnographic Museum in Kraków, I was enchanted by the elaborately decorated hats.  I've written before about how I used to wear and collect hats.  Although I don't collect hats any more and rarely wear them, I guess I still have some inner hat lust that emerged at the sight of these beauties.

More than most accessories, hats seem full of symbolic and cultural significance.  As we were traveling, we visited synagogues, where Q was required to cover his head, and cathedrals, where he was asked to remove his hat to uncover his head.  Wearing hats can denote respect or disrespect.  Historically, women's hats have often been derided as silly fashion accoutrements, and yet a woman wasn't considered fully dressed without an appropriate hat.  Each type of hat has its own meaning -- the cap, the fedora, the bowler, all call to mind different situations and different types of people. (In one episode of the British sitcom, Are You Being Served?, they discuss specific rules about who is allowed to wear which type of hat, based on their rank in the company, for example.)  Consider this quote from Bella Abzug:
I began wearing hats as a young lawyer because it helped me to establish my professional identity. Before that, whenever I was at a meeting, someone would ask me to get coffee. -- Bella Abzug
The hats at the Ethnographic Museum seemed more like the kind one would wear on festive occasions, rather than an everyday accessory.  But as the museum signage notes, folk costumes carry a great deal of meaning about one's social place, so without a more detailed understanding of traditional Polish culture, I can't speak to the cultural significance of the hats.  But I can enjoy the artistry and adornment they represent. 

Monday, November 3, 2014

Delightful Details: Embellishment at the Ethnographic Museum in Kraków

When I'm looking at clothing in museums, I'm always on the lookout for Delightful Details -- those little touches that make all the difference in the garment.  I'm particularly drawn to embellishment:  Embroidery, beading, and other types of surface design make my heart sing.  The Polish folk costumes at the Ethnographic Museum were full of embellishment and I tried to capture as many details as possible while I was there.  There is so much inspiration here -- I am excited about the idea of translating these folk designs into more contemporary clothing embellishment and textile art.

Remember that you can click on the photos to enlarge them.  (My apologies for the quality of some of the photos -- it's hard to get good photos in museums at times.)  


This vest features seed beads and sequins to create floral designs and shirt buttons (they look like mother-of-pearl to me) to outline the petals at the bottom of the vest.  I also like the triangle points at the top of the vest, which create an interesting neckline. 

Sunday, November 2, 2014

The Ethnographic Museum (Kraków, Poland)


Folk costumes at the Ethnographic Museum (Kraków, Poland).

The next day we spent the morning at the Rynek Underground museum (as I mentioned in an earlier post) and then walked back to the Kazimierz district to see the Ethnographic Museum, housed in the former town hall building.

The museum had reconstructed interiors and models of homes and workshops (e.g., a fulling mill), tools and implements related to agricultural work and craft, and displays of folk art, such as nativity scenes (more szopka!), decorated eggs, and a special exhibition of woodcuts. However, I was mostly interested in the costumes.

The museum had a whole room devoted to folk costumes, and I spent a happy hour or so there, taking photos of costumes and embellishment details. Luckily, there was also a comfy sofa, so that Q could sit and wait for me to be done ooh-ing and ah-ing over the costumes.


The exhibit also had a nice general summary of Polish folk costume, noting that: "Costume was of primary importance in folk culture. It helped to determine social status, area of residence, marital and financial status of a person wearing it. The function of a festive attire made people spare no effortmor [sic] expense on it. Costume is one of the leading elements in folk art."

See? My interest is justified, both at an artistic and anthropological level.

Sunday, March 20, 2011

Color Junkie

"The purest and most thoughtful minds are those which love colour the most."  -- John Ruskin

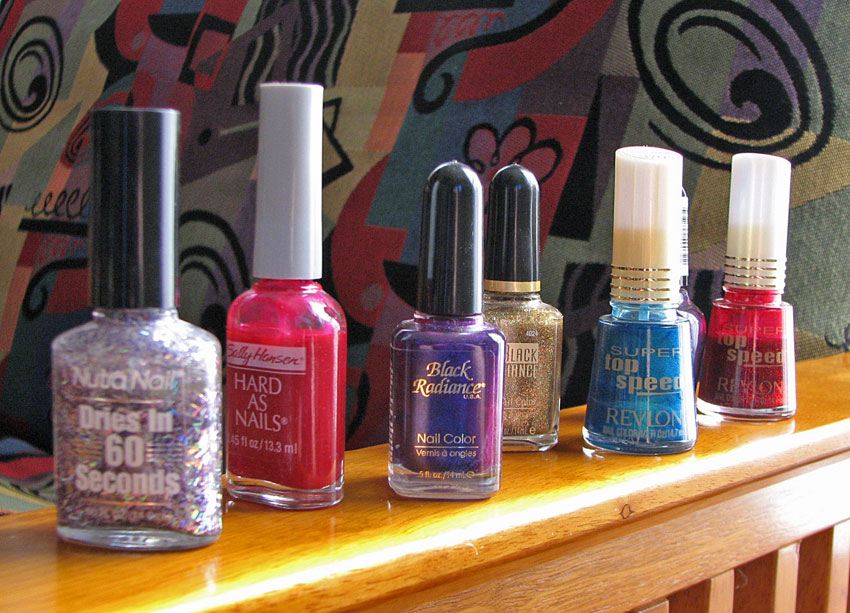
As I've mentioned before (here and here), I love color.  I am drawn to bright, deep colors, compelled by them.  Walking through the drugstore, my eye would be caught by the luscious metallic colors in the nail polish aisle.  The fact that I hardly ever wore nail polish seemed immaterial -- how could that compete with these gorgeous shiny bottles?  I finally bowed to the inevitable and gave them all away last year and have resisted buying more (thus far). 


Recently I've been getting my color fix through fabric.  I love making burp cloths, for example, because I get to put together bright flannels and chenille with contrasting colors of thread for the serged edging.  Having the fabrics run under my fingers makes my soul sing. 


I also had fun choosing fabrics to make linen dinner napkins.  Who needs boring, white napkins when you can have every color of the rainbow at your table?


And, of course, my fiber fantasy scarves are full of color and texture and sparkle -- what a joy to put so many different colors together.  It's like creating a symphony; each color has to live in harmony with the rest.  You can see pictures of my first fiber fantasy scarf here, and pictures of my fringe madness scarf here (check out the riotous color).   I'm working on a scarf now in blues and greens, turquoise and teal (oooh, love that combo); I'll post pictures soon.  I also made one in earthtones with copper accents and a bit of red for zing:


And, of course, colorful flowers are always a delight.  In the midst of winter, my Christmas Cactus offers a profusion of bright pink petals that look ready to take flight.

November, 2009

And one can find cut flowers and bouquets everywhere. 

From a bouquet we sent to my grandmother for her last birthday (November, 2010)
Blue roses (on display at Cedar Ridge for their gala event, November 2010)
Isn't this bouquet from my father and his wife lovely? (November, 2010
Now that spring is here, brightly blooming flowers are popping up in my garden; Q says they are like fireworks, exploding into full bloom one after another. 

I want to live a life infused with color.  Why shouldn't we be surrounded by gorgeous color in everything we do?  I believe that everyday items should be beautiful, so that we can have joy in our daily activities.  My philosophy is similar to that of the Art Nouveau movement, which held that art should be a part of everyday life.  Of course, napkins and burp cloths and flowers are not art, but they remind us that the elements of art (color, design, value, meaning) can be found all around us and that our environment impacts our experience.  We should design all aspects of our environment purposefully to enhance the quality of our lives.  For me, that means a life rich with color.

"The whole world, as we experience it visually, comes to us through the mystic realm of color."  ---  Hans Hofmann

"Color possesses me.  I don't have to pursue it.  It will possess me always, I know it.  That is the making of this happy hour:  Color and I are one.  I am a painter." --- Paul Klee

"Colour is my day-long obsession, joy and torment." --  Claude Monet


If you need a burst of color in your life, check out the items for sale in my Etsy shop.

Friday, July 30, 2010

Fiber fantasy scarf: Fringe madness


I spent a couple of weeks sewing in preparation for a show, and I was excited to make more of the fiber fantasy scarves.  I had so much fun working with the recycled sari ribbons and yarns that I wanted to make another scarf using them. I had two main goals:  to create a diagonal line that avoided the typical vertical or horizontal layout of fibers and to create a more open, less dense feel for the scarf.  So I laid out the sari ribbon on the diagonal, looping it back and forth.  In between, I laid out recycled sari yarn and commercial yarns and ribbons, but without filling in the space fully. 

I used free-motion stitching to make stylized flames in red, orange, and yellow threads, and then used heavy gold metallic thread to stitch spirals along one long edge of the scarf.  The flame design doesn't really show up on the scarf, but the gold metallic shows up nicely.  If I want the stitching to show up on these scarves, I need to use heavy-weight thread in a contrasting color -- otherwise, the thread blends into the other fibers of the scarf. 

I used a different water-soluble stabilizer for this scarf (Aquabond).  I found the adhesive to be a bit weaker, but it rinsed out more easily than the Aqua-Magic I had used previously, which tends to leave behind adhesive residue.  After rinsing out the stabilizer,  I had to untangle the fringe (which was quite a task).  Then I trimmed the fringe and hand-knotted it on all four sides of the scarf.  This took a long time, but turned out to be a good task to keep me from being antsy while waiting for a doctor's appointment. 

Overall, I'm pleased with how this turned out.  The colors are fabulous -- the recycled sari ribbon and yarn really has intense, luscious color -- and I think the fringe gives it nice movement.  It's a long scarf (about 6" wide and 54" long), which means it can be worn in quite a few different ways.  At the show, this scarf attracted attention -- a number of people touched it, picked it up, tried it on.  Seems like a sign of a successful design to me!  The scarf is for sale in my Etsy shop

Sunday, March 7, 2010

Mud cloth vest: How long did it take you?

Vest back
Vest front, collar turned down 

My latest wearable creation is a cross-cultural fusion, representing the global marketplace at its best.  I used the pattern for a traditional Tibetan panel coat from Folkwear, with the outside panels from handwoven mud cloth from Mali and commercial black linen fabric, which were then embellished with batik-dyed bone beads from Kenya and cowrie shells.  The vest is lined with a cotton print that has a hand-dyed look and cream-colored linen fabric.  The facings are in a wine-colored linen fabric.  I can see that this is yet another example of my penchant for wearing costumes


Back of vest, half-beaded. 
See the difference the beading made?
 
Vest front, half-beaded 
The beading made a huge difference in this piece. Before the shoulder pieces were beaded, the vest wasn't particularly flattering. The visual weight took the eye downward, toward the wider part of the panels. I tried out a couple of different fabrics for the shoulder pieces, but none of the colors looked right. (I don't have much in the way of earthtones in my fabric stash.) In the end, I went with a heavier-weight black fabric (cotton? silk? I'm not sure). This helped support the shoulder line of the garment, but didn't create much visual contrast with the rest of the vest. Once I sewed the bone beads and cowrie shells on the shoulder pieces, the shoulders gained greater visual weight and looked wider, creating more balance with the width of the bottom of the vest. I also like the way that the batik-dyed bone beads blur the line between the black and white spiral mud cloth piece and the shoulder piece.
Vest back, detail of beading


Vest, front left shoulder, detail of beading 


Vest, left side
I knew I wanted to put the spiral bone beads under the arm to connect with the spiral mud cloth fabric of the front panels.  I also wanted some more cowrie shells, and I figured putting them underneath the spiral beads would camouflage the slight puckering of the linen fabric underneath the shoulder accent piece.  This ended up becoming a line of cowrie shell and spiral bead fringe, which has a lovely movement and sound as the shells bump into each other.  As a happy coincidence, this creates a visual line at the waist, which is flattering, particularly in a loosely fitting garment like this.  Who knew? 

Armhole, beading detail


This vest is a great example of why I have trouble answering the question, "How long did it take you to make that?"  First of all, I don't keep track of my hours in any precise way when I am involved in a lengthy project.  Second, I tend to work on multiple projects simultaneously, and I may put aside one project for months (or even years) before getting back to it.  This tends to happen when I hit a snag in the design or construction process.  
Vest front, opened to show lining
I started making this vest a year ago.  It took me a day or two to cut out the pattern pieces; this process was complicated by the fact that I was trying to maximize the visual impact of the mud cloth design from three separate pieces of mud cloth.  There were a few places where the weave needed to be reinforced, so I backed those sections with a piece of cotton fabric, using fusible web. I also had a hard time finding a lining fabric, as I have little in my fabric collection that fits with the muted earthtones of the mudcloth, so there was some hunting and pondering time in there.  I don't remember how long it took me to sew the panels together, but I put in extra time serging the raw edges of the fabric to keep the handwoven fabric from raveling.  Unfortunately, just as I was serging the last seam on the lining, I ended up cutting into the fabric.  Argh!  This kind of snag is what usually makes me put the project aside until I feel ready to deal with it again. 

Closeup of patch on lining
What with my work schedule and other projects, I didn't get back to this vest until a month ago.  I've been on a mission to finish up my works-in-progress, so I pulled this project out as the next to be completed.  I decided to put a patch on the cut section of the lining fabric, so I had to hunt through my stash again to find a complementary fabric.  The cotton print with cowrie shells seemed perfect, so I fussy-cut a patch and fused it onto the lining, using a decorative stitch to anchor it.  It actually looked neat, kind of like a postage stamp or a designer label.  In fact, I liked it so much that I was sorry to see it partly covered by the facing.  It's nice when a mistake turns into a design feature. 

The next challenge was basting the outer layer and the lining together.  The outer layer had stretched quite a bit more than the lining, and I ended up basting, ripping out the basting, and re-basting, which took quite a bit of time as it was all done by hand.  Once that was fitted together, it was time to do the facings and the neckband, which I hand-basted, machine stitched, and then hand-tacked to the lining.  The facings and neckband alone took several days to complete, largely due to the hand-stitching.  It helped that we were snowed in, so I had a week to work on the vest (between bouts of shoveling snow, that is). 
Auditioning beads       
Then I auditioned various possible shoulder fabrics in between sewing cowrie shells by hand on the neckband.  I finally chose the black fabric and hand-stitched the shoulder pieces in place.  It was clear that it needed more beading, so I tried out various bead arrangements (more pondering time here).  After deciding on the bead design, it was just hours and hours (and hours!) of hand sewing the beads and then the whole garment was finally complete. 

I could, of course, try to estimate all the time involved in the design, construction, and embellishment of the vest.  But that isn't even the whole story.  Really, this vest began a decade ago, when I first had the idea of making a panel coat from mud cloth, and I began my search for the fabric and beads.  I got gorgeous pieces of mud cloth from African import stores in Georgetown and purchased bone beads in Dupont Circle and Adams Morgan (neighborhoods in Washington, DC).  I searched online for cowrie shells of the right size and color -- I only found the ones I used here quite recently.  Or maybe the story really began twenty years ago, when I made a Tibetan panel coat for my sister and dreamed of having one of my own (I probably should have kept that one and given her something she would have liked better -- I doubt she got much use out of it).  How do we count the hours of imagination and dreaming and looking for supplies?  

This is why I never know how to answer the question, "How long did it take you to make that?" except to say . . . "A long time."


Saturday, December 5, 2009

Beaded bellydance bra

I never got around to taking pictures of the dance costume bra I finished over the summer. This goes with the beaded bellydance belt I finished a while ago. I made the bra from a Kwik Sew pattern, using denim from old jeans, reinforced with stiff, fusible interfacing. The cups were then further reinforced with fusible fleece and two layers of buckram. I covered the finished bra with stretch velvet to match the belt. Then the beading began!


The motifs are all hand-beaded, one bead and sequin at a time. The motifs are a mix of glass seed beads of various clear and silvery tones, Swarovski crystals, and Czech glass beads, edged in sequins and more glass beads. The oval cabochons and the big triangular crystal on the top part are made of sew-on Swarovski crystals that were then caged with glass seed beads. The fringe is made with glass seed beads and three kinds of Swarovski crystals to make a pattern.


Under the fringe, I beaded a swirly design to match the design on the belt. It's hard to see in the picture, but this is a raised design. The fringe moves while I dance, of course, so this design peeks out under the swaying fringe.
The straps are too plain, and I'll probably do more beading there at some point. But the costume is wearable at this point -- in fact, I wore it for a performance in August, and it fit well and held up to the rigors of dancing. I also got a number of compliments from other dancers, so I'm pretty pleased with how it turned out.

Sunday, September 13, 2009

Fiber fantasy scarf

So I finally finished the scarf I started a while ago. I had laid out various yarns and ribbons in a faux-weave pattern on a water soluble stabilizer, stitched them together and then added free-motion embroidery in purple and gold metallic threads. I hadn't liked the way it came out initially -- it was too wide, too short, and not drapey enough. So I put it aside and went on to other things. Then I got the idea that I could cut it apart and put in ribbon inserts to make it longer and drapier. So that's what I did this weekend.

The ribbon inserts and fringe are recycled sari fabric that I knotted to add interest and texture. I also added some more free-motion embroidery.


I quite like it now. Since I cut the initial scarf in half lengthwise, I have another section to play with. I haven't decided if I'll make another scarf like this or use it for something else.


In the meantime, I have all kinds of ideas for variations on this theme, so once I get through a couple of other projects, I plan to make some more scarves with this technique.