Showing posts with label sewing. Show all posts

Tuesday, December 29, 2015

Rediscover the Joy of Learning

Stuff Your Eyes with Wonder (Deborah C. Stearns, 2013)
Trying something new, I began my Inspiration Series.
I love to learn new things.  In fact, I positively deliciate in learning.

* Deliciate = to enjoy or indulge oneself, luxuriate, revel, to take one's pleasure.  

Did you feel a little zing as you learned that word?  A recent study found that learning new words stimulates the ventral striatum, the part of the brain that is associated with reward and pleasure.  In other words, learning a new word seems to activate the same part of the brain as gambling, sex, and tasty food.  (One could say that this means you probably deliciate in learning the word "deliciate.")

I suspect that this is not just limited to learning new words, but is true of learning more generally.  There is pleasure in acquiring knowledge and mastering new skills.  One recent study of elementary school children found that:
joy arrives when the child surmounts a series of difficulties to achieve a goal. One of the authors’ videos shows seven-year-old Esko, tapping himself proudly on the chest and announcing, “Hey, I figured out how to do math!” A desire to master the material leads to more joy than a desire to simply perform well, Rantala and Määttä add: joy often accompanies “the feeling of shining as an expert.” (from http://www.creativitypost.com/education/wheres_the_joy_in_learning)  
Sadly, I think we often lose sight of the joy of learning.  I remember one student in my General Psychology class some years ago who insisted that there was nothing he wanted to learn -- nothing at all.  It made me unutterably sad.  Learning can be a wonderful experience, and yet many of us forget its pleasures, thinking of it only as joyless labor.

I am fortunate to work in a profession that is committed to lifelong learning.  Higher education is not only in the business of providing access to learning for our students, but also recognizes the importance of ongoing learning for faculty and staff.  For example, I was able to spend last year on sabbatical so that I could learn more about the flipped classroom approach and the science of teaching and learning.

But you don't need to be an academic or take a sabbatical to experience the joys of learning.  Want to learn something new?   Here are some suggestions.

I've been reading for as long as I can remember.
Books are the bees which carry the quickening pollen from one to another mind.  ~James Russell Lowell
  • Read.  I read voraciously, learning from science writers, biographers and scholars of all types.  I find new ideas in speculative fiction and memoir.  I read online articles, physical books and magazines, and enjoy the occasional audiobook.  Reading is accessible in any number of formats, and can be enjoyed without cost through libraries and the internet.  If you are a bibliophile, definitely head over to Brain Pickings, one of my favorite blog finds this year.  

 Baining Night Dance Mask (Kavat)
made of bark cloth by the Central Baining people
from Papua New Guinea, New Britain
(from the Metropolitain Museum of Art, NYC)

The art and science of asking questions is the source of all knowledge. ~Thomas Berger

  •  Ask questions. Opportunities for learning are everywhere for those who are curious about the world.  When we ask questions, we open ourselves to new learning.  Ask questions of your friends and family to learn more about their lives and experiences.  Ask questions of experts to learn from their expertise.  Ask questions of yourself to learn more about your inner world.  If you can't find someone to answer your questions, go find the answer yourself!  (I'm still working on finding out more about the art of Papua New Guinea, for example.)
    
    We all have an Elephant's Child, full of insatiable curiosity.
    Drawing by Kate Reed (used with permission of the artist)

  • Research.  When you find a topic that interests you, pursue your curiosity.  Explore it in depth.  Follow links, look for additional readings, ask questions and find answers.  Become an expert.  I spend many hours researching to prepare for my presentations and it has led me to all kinds of interesting learning -- from the science of happiness to successful relationships to all corners of human sexuality (check out my posts on sexual language, the sexual double standard, and same-sex marriage, for example).  

Dr. Sun Yat-Sen Classical Chinese Garden in Vancouver (2012),
where I learned about traditional Chinese garden design

All the world is a laboratory to the inquiring mind.  ~ Martin H. Fischer

  • Travel.  Travel offers us the opportunity to learn more about history, architecture, art, science, language and culture.  Explore the environment and notice what is different.  Talk to the people who live there.  Try new foods and have new experiences.  Read guidebooks to find out more about the places you visit.  Go to the local sights and visit the museums.  I always learn a lot from traveling, as you can tell from my extensive travelogues (such as my blog posts on Krakow, Prague, and Iceland).

via
  • Listen to podcasts.  There are so many great podcasts out there -- free and full of learning potential.  I listen to podcasts on long drives and while I'm cooking or filing.  Podcasts like This American Life, RadiolabInvisibilia, and The TED Radio Hour have given me insight into all kinds of topics I knew little about.  I'm looking forward to getting into Hidden Brain, as soon as I have some time, as I have really enjoyed Shankar Vedantam's pieces on NPR.

  • Watch documentaries.  No matter where your interests lie, there is sure to be a documentary for you.  I favor historical and cultural documentaries, and I'm always finding new ones to watch through Netflix.  (I haven't even finished all of Ken Burns' documentaries yet!)  Make sure it is a reputable source, of course -- not all of the "documentaries" on YouTube are accurate.  So check out your PBS station or other credible media sources.  Beyond documentaries, you can also watch educational videos at TED-Ed and learner.org.  
I learn from my students, too.
(Photo by Sanjay Suchak)
  • Take a class.  This gives you a chance to do more in-depth learning and connect with other learners.  Classes are available everywhere -- the local recreation center, community college, art/dance/writing centers, and other community resources.  Check out retail outlets, too, as you can find cooking classes at your local kitchen store, jewelry classes at the bead store, and ceramics classes at the art store.  If your local area doesn't have the class you want, there are plenty of online classes; you can study with experts all over the world without ever leaving your home.  I generally prefer face-to-face classes (such as the television/video classes I took last year), but I've also enjoyed several Craftsy classes and I'm looking forward to an online photography class with Ricky Tims that starts in January.  
  • Get private lessons.  If you know what you want to learn and can find someone to teach you, you might want to invest in private lessons.  These can be a bit more expensive than classes, but you get to focus on what you want to learn at your own pace and in your own time.  If you have a local expert, face-to-face lessons are a great option, but you could also consider distance learning via video calls (Skype, Google Hangout, etc.).  Over the last year, I've been studying pattern fitting with the fabulous Sarah Veblen, and watching her figure out the right shape for a sleeve or rotating a dart has definitely expanded my understanding of how to engineer clothing that fits well (though I still have much to learn).
What Would Your Eyes See If They Were Newly Bloomed?
(Deborah C. Stearns, 2007, made as a class assignment)
  • Try something new.  We often think of learning only within formal contexts, but we can learn anytime and anywhere.  Walk a different route and take note of what you see and hear.  Use a recipe you've never made before or tweak an old recipe -- what worked well and what didn't?  Explore unfamiliar types of music, art, performance, or athletics.  Try something new and see where it takes you.
Start off your year by rediscovering the joy of learning.  You know that learning is good for you -- it keeps your mind engaged and helps you grow and develop your capabilities.  But don't forget that it is also pleasurable.  So go ahead and deliciate in learning.  I'll be deliciating, right along with you.  

Sunday, December 6, 2015

Litlibaer (Westfjords, Iceland)


Just up the road from the seal colony is Litlibaer, a historical 19th century farmstead. Not only is it a charming home with historic photos and tools, but they serve coffee and waffles! Just the restorative lunch we were looking for after a long drive.


Here you can see the traditional turf roof on the farmhouse. It also included both stone and wood construction.


The rooms were quite small, with low ceilings -- very cozy. We ate at the table by the window and enjoyed looking at the photos of family members who had lived at the farmhouse over the years.


A small pantry area next to the stairs included a variety of historic kitchen tools.


Q is enjoying his coffee and waffles.  (Not being a coffee person, I had hot chocolate.)  The waffles were heart-shaped and topped with jam and whipped cream -- quite delicious!


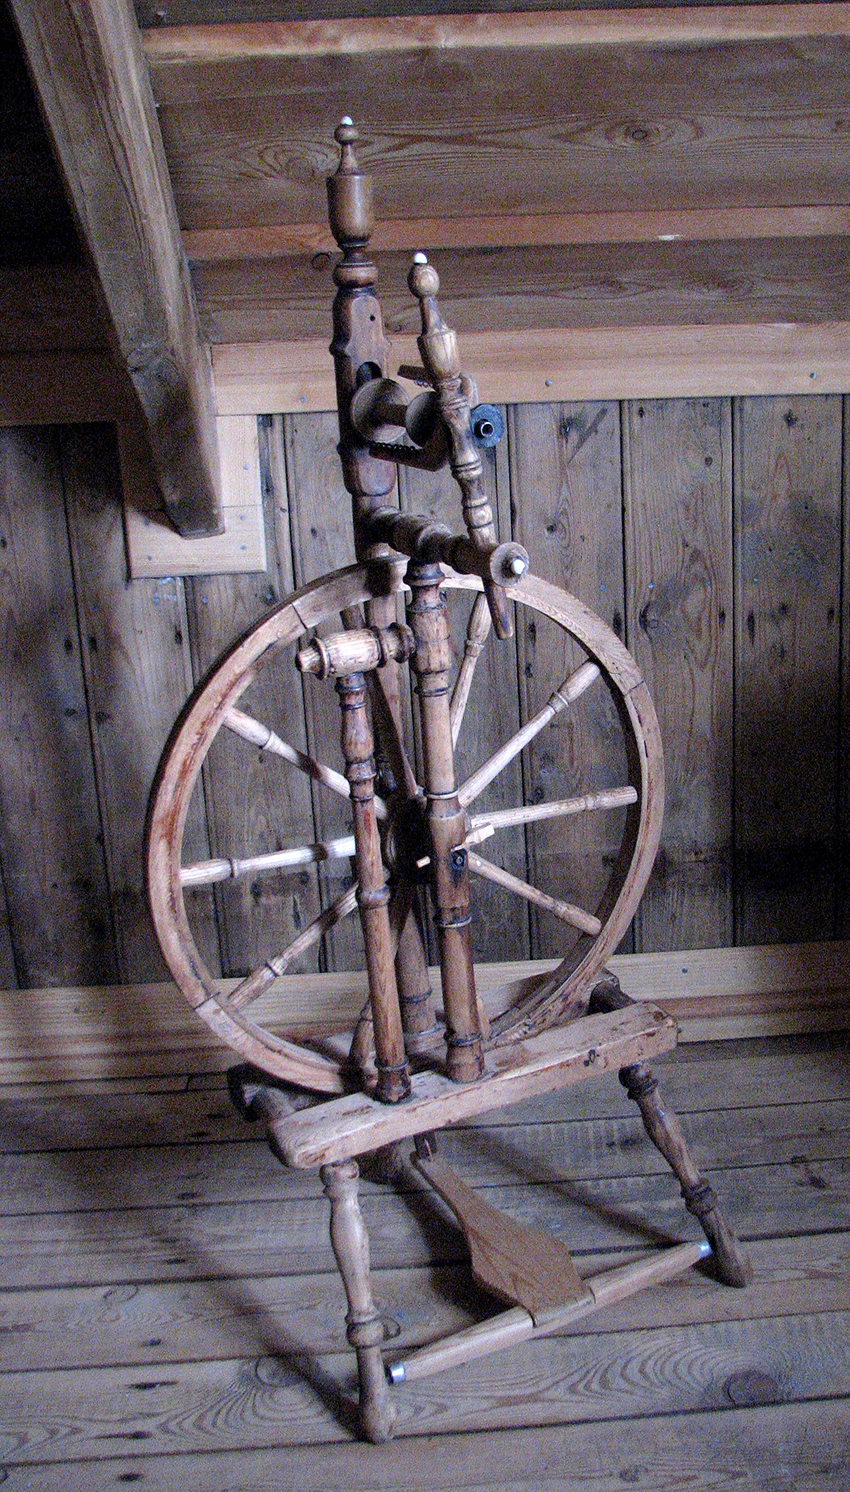
A ladder to the attic revealed two more (small) rooms, each with tools and materials presumably from the 19th century work at the farm. Wool is a major Icelandic product, so spinning would have been a common activity.


More antique tools were displayed under the attic window.


And, of course, I had to take a photo of this beautiful antique sewing machine. It's all set up with thread and everything! I managed to resist the temptation to do some sewing.

Next up: The Museum of Icelandic Sorcery and Witchcraft

Sunday, August 30, 2015

Inspiration Series: The Beauty of the Butterfly


“We delight in the beauty of the butterfly, 
but rarely admit the changes it has gone through to achieve that beauty.”
-- Maya Angelou

The butterfly is a symbol of transformation, even of spiritual rebirth.  We can start as a lowly, unassuming caterpillar but emerge from the chrysalis as a beautiful, winged creature.  But what happens in between?  It turns out that we don't entirely know.  And maybe we don't really want to know.  Because what happens in the chrysalis is that  the caterpillar turns into goo.  Yes.  Soupy goo.  And while that is really intriguing, from a scientific standpoint (Wow!  How does that goo become a butterfly?), it is kind of, well, unappealing.

That's the problem.  We love to see the transformation, to celebrate the amazing potential for change, but we don't want to know the process, particularly if it shatters our illusions.  Millions of people watch the The Biggest Loser for its displays of dramatic weight loss, but I'm betting that fans would probably rather not be confronted with the show's brutal treatment of contestants.  We'd rather just applaud the transformation from fat to thin than be confronted with the realities of what that entails.  Shape magazine, for example, features "success stories" of weight loss, but refused to include a photo of one woman in a bikini, presumably because her belly skin showed the aftereffects of extreme weight loss.  They'd rather hide that part of her story, to present an idealized version of her weight loss.  We'd rather imagine that the transformation from obese to skinny is flawless and simple -- a modest effort of diet and exercise, and the perfect trim body is revealed!  But it's not true.  Radical transformation is often grueling, and it leaves its mark.

When we focus solely on the before-and-after, ignoring the process of transformation, we create a fantasy that change is easy to achieve.  This creates false hope . . . and crushing disappointment for those who expect to transform seamlessly and effortlessly.

We'd rather believe that someone is a "natural beauty" than acknowledge the time and money and pain that is often involved in achieving cultural beauty standards.  Historically, women have been encouraged to endure dangerous, costly, and time-consuming procedures to become beautiful, but then also to pretend that they look this way naturally.  Don't admit to coloring your hair or getting cosmetic surgery.  Don't complain about the pain of high-heeled shoes or bikini waxing.  Don't acknowledge the hours of effort that went into your hair and makeup and clothing.  Oh, I just rolled out of bed looking like this.  We demand not only that women transform to be beautiful but also that they then lie about it.

When I discuss social change movements with my students, they are often unaware of the long-term, difficult struggles that were necessary to enact change.  My students will say that the United States government "gave women the right to vote," rather than acknowledging the decades of struggle by committed suffragists who marched, were harassed and arrested, facing harsh treatment in prison.  Women like Alice Paul, who went on a hunger strike in jail and was painfully and dangerously force fed, are simply erased in the narrative that the government somehow spontaneously recognized the error of excluding women from equality under the law.  Change is difficult.  The process of social change can be ugly and brutal.  But to ignore the realities of history is to deny the work and suffering of those who fought for social justice.

Transformation can be wondrous.  But let's honor the process of transformation, as well.  We can start with these CT scans of the development inside the Vanessa cardui chrysalis.  Yes, the inside may be unpleasantly gooey, but seen from another angle, the developing butterfly is lovely.


Life is not a series of static before-and-after photos.  Life is a process of change and development.  Let science and history and psychology reveal to us the real truth of change, in all its complexity, both beautiful and ugly.  I want to know the changes the butterfly went through.  I think we all need to know.

****************************************
Notes on making these pieces:

I started with the quote and a photograph of an Owl butterfly I took when we visited the Butterfly Conservatory at the American Museum of Natural History in New York City.  The quote was an obvious fit with the photo, so that part was easy.  I did a bit of clean-up of the photo in Photoshop (cropping, fixing contrast, and using the filmgrain filter, which brightened the greens and made the colors pop more).  The photo and the quotation were printed on my Epson C88+ printer, using pre-treated fabric sheets.

I got three of the pieces started, but not finished, before my studio renovation, so they sat in limbo for about two years.  I have been eager to get back to these and finish them, but then had a bit of trouble getting started sewing after such a long hiatus.  So they have had a long mellowing process.  *grin*

(Note that you can click on the photos to enlarge them.)


Beauty of the Butterfly #1 (approx  5.9  x  8")

I started with this piece, which includes improvisational crazy piecing and raw-edge applique (using fusible web) onto a base of Timtex stabilizer (which was the base used for all the pieces).  I did some hand-embroidery to frame the appliqued fabrics, including back stitch (which I haven't done in a while) and french knots.  As with all the pieces, the quotation was fused and then edge-stitched using decorative machine stitching, backing fabric was added, and the entire piece was machine edged with a zig-zag stitch.


Beauty of the Butterfly #2 (approx 5.75 x 8")

For this piece and the next one, I explored sliced strata:  sewing strips of fabric together to create a striped unit, which is then cut at various angles and sewn back together with additional fabric strips as inserts.  I was inspired by Rayna Gillman's work (although only in general approach -- the final pieces don't look like her work at all).  I added machine stitching (with metallic thread) and some hand embroidery (using ArtFabrik's hand-dyed thread).


Beauty of the Butterfly #3 (approx 8.38 x 6.25")

This piece used the sliced strata, but with a a portrait orientation to emphasize the verticality of the insert strips (well, diagonality, I guess, since they aren't truly vertical).  I also mounted the butterfly photo on a separate piece of Timtex, added fabric binding, and then sewed it down to the main piece.  I wanted to try framing the photo separately as its own piece, rather than embedding it within the larger piece.


This separateness was enhanced by bead embellishment -- I created a picot edge using gold beads around the "framed" photo, and added seed beads, bugle beads, and glass leaf beads on the surface of the "frame."  Doing the edging proved more difficult than I expected because I did the beading after the photo was sewn down to the main piece.  Hand sewing through two layers of Timtex and four layers of fabric was challenging (I broke one needle and bent another), and I had to bring up the needle at an angle to get to the edge.  Next time, I might do some of the beading before mounting the piece (although it can be hard to machine stitch without hitting the beads).  I also found carrying the edging around the corners challenging (this was my first attempt at a picot edge) -- I might explore other options for the corner treatment in future pieces.  


The beading around the photo needed to be carried into the larger piece, as well, so I included some seed beads on the strata. I like the dimensionality that was created through the separate photo framing and bead embellishment.


Beauty of the Butterfly #4 (approx 6.15 x 8.25")

Here I went back to improvisational crazy piecing, but using the leftover strata pieces and trying to create greater value contrast with the bright green insert strips.  The fabric pieces crossed over the photograph to connect with the diagonal lines of the grass in the photo.  Unfortunately, that also cut off part of the butterfly wing.  So I printed out the butterfly photo on organza and fused the organza butterfly over the photo.  It creates an interesting effect -- the photo is a bit blurry, but also has more depth.  (The artist Wen Redmond uses organza to enhance photos on fabric, which gave me the idea.)  I added machine stitching and hand embroidery (seed stitch and french knots, using ArtFabrik's hand-dyed thread).


Beauty of the Butterfly #5 (approx. 6.5 x 8.25")

For the last piece, I wanted to go in a different direction, so I created a landscape -- or really, a grass-scape, I guess.  I was inspired by Laura Wasilowski's Craftsy class on fused collage landscapes (although I didn't strictly follow her process, nor does the piece look like her work).  I used hand-dyed fabric from Cherrywood -- my first time using their fabric, but certainly not the last.  I love the rich color and depth of their fabrics.  After prepping the fabric with fusible web, I cut out grassy shapes freehand and layered the pieces to create a field of different green grasses. I used a gray for the sky to blend in with the photo background, and fused a cloud shape from the gray fabric and one from the organza photos I had printed to create a cloud-shadow.  Then I did lots of machine stitching -- I edged the cloud shapes and did lots of "grass-stitching" in the green shapes to create texture.  I really like how it came out!

If you would like to be eligible for this week's Inspirations giveaway (for the card pictured at the top -- Beauty of the Butterfly #2), just leave a comment on this post by Sept. 6, 2015. Be sure that I have your email address so that I can notify you if you are the winner. I'll do a random draw and announce the winner during the following week.

Sunday, March 31, 2013

Inspiration Series: Stuff Your Eyes with Wonder


I'm beginning a new series of small textile pieces that will incorporate quotations and images that reflect some aspect of the quotation -- I'm calling it my Inspirations series.  I'm inspired by this new series, and I hope that the pieces inspire others as well.  My plan is to make multiple versions of each piece, to explore different design variations.  I think this will work well for me, as it allows me to combine the thoughtful exploration of ideas as well as experiment with design and embellishment.  Plus, I'll build up a body of small works, which I am currently lacking.

Oh, and did I mention the giveaway part?  I'll choose one version of each piece to give away to my blog readers (that's you!).  I hope to complete a new set of pieces every month.  So come back regularly to catch the giveaways!  (Remember that you can sign up through a blog reader or get new posts by email -- see the links on the sidebar.)

Sunday, February 24, 2013

A home for imagination and creativity


When I was a child, I was given a dollhouse.  I played with it throughout my childhood and kept it set up even after I stopped playing with it (my younger sisters continued to play with it while I was in college).  When Q and I moved in together, I set up the dollhouse in our apartment.  Eventually, though, I stored the dollhouse and all its furnishings in a closet, waiting for a time I could bequeath it to another child.

Looking spiffy with the fresh paint --
and the open door invites us to peer inside.

Sunday, January 15, 2012

Exuberant enthusiasm and concomitant excess

So often we are advised to practice moderation.  "All things in moderation," they murmur, urging us to sample pleasures in small portions.  We are assured that excess is bad; after all it is, well . . . excessive.

I've never been good at moderation.  I'm full of bubbling enthusiasm that inspires me to fling myself wholeheartedly into one activity after another.  I go from a passionate pursuit of teaching perfection to months of extreme gardening only to then throw myself into a grandiose creative project.  There is no temperate jogging for me -- I'm always running full-tilt.

I've never forgotten some words of wisdom my undergraduate class received during our college orientation.  We were urged to pursue our passions intensely.  If we enjoyed a writer's work, we should read everything we could find by that author.  If mathematics intrigued us, we should immerse ourselves in the study of mathematics.  I found this advice deeply compelling.  The idea of plunging headfirst into something, letting it take me over completely, fit my approach to life.  Moderation be damned!  If we are going to do something, let's really go for it, fully and without reservation.  I wanted to meet life with exuberant enthusiasm, not cautious reserve.  Indeed, in my first year of college one of my friends gave me a sign that reads, I Am Subject To Bursts of Enthusiasm.  I have it on my shelf today as a badge of pride. 

Sunday, March 20, 2011

Color Junkie

"The purest and most thoughtful minds are those which love colour the most."  -- John Ruskin

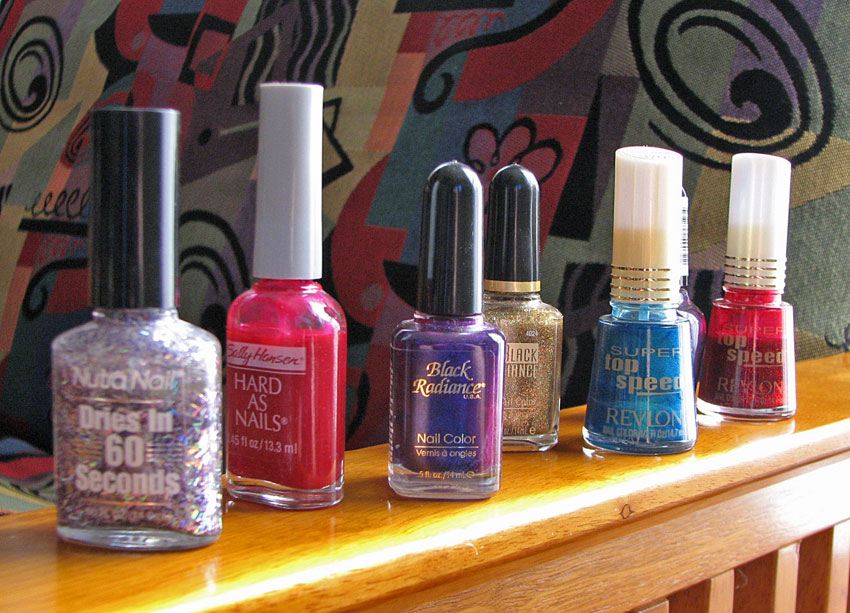
As I've mentioned before (here and here), I love color.  I am drawn to bright, deep colors, compelled by them.  Walking through the drugstore, my eye would be caught by the luscious metallic colors in the nail polish aisle.  The fact that I hardly ever wore nail polish seemed immaterial -- how could that compete with these gorgeous shiny bottles?  I finally bowed to the inevitable and gave them all away last year and have resisted buying more (thus far). 


Recently I've been getting my color fix through fabric.  I love making burp cloths, for example, because I get to put together bright flannels and chenille with contrasting colors of thread for the serged edging.  Having the fabrics run under my fingers makes my soul sing. 


I also had fun choosing fabrics to make linen dinner napkins.  Who needs boring, white napkins when you can have every color of the rainbow at your table?


And, of course, my fiber fantasy scarves are full of color and texture and sparkle -- what a joy to put so many different colors together.  It's like creating a symphony; each color has to live in harmony with the rest.  You can see pictures of my first fiber fantasy scarf here, and pictures of my fringe madness scarf here (check out the riotous color).   I'm working on a scarf now in blues and greens, turquoise and teal (oooh, love that combo); I'll post pictures soon.  I also made one in earthtones with copper accents and a bit of red for zing:


And, of course, colorful flowers are always a delight.  In the midst of winter, my Christmas Cactus offers a profusion of bright pink petals that look ready to take flight.

November, 2009

And one can find cut flowers and bouquets everywhere. 

From a bouquet we sent to my grandmother for her last birthday (November, 2010)
Blue roses (on display at Cedar Ridge for their gala event, November 2010)
Isn't this bouquet from my father and his wife lovely? (November, 2010
Now that spring is here, brightly blooming flowers are popping up in my garden; Q says they are like fireworks, exploding into full bloom one after another. 

I want to live a life infused with color.  Why shouldn't we be surrounded by gorgeous color in everything we do?  I believe that everyday items should be beautiful, so that we can have joy in our daily activities.  My philosophy is similar to that of the Art Nouveau movement, which held that art should be a part of everyday life.  Of course, napkins and burp cloths and flowers are not art, but they remind us that the elements of art (color, design, value, meaning) can be found all around us and that our environment impacts our experience.  We should design all aspects of our environment purposefully to enhance the quality of our lives.  For me, that means a life rich with color.

"The whole world, as we experience it visually, comes to us through the mystic realm of color."  ---  Hans Hofmann

"Color possesses me.  I don't have to pursue it.  It will possess me always, I know it.  That is the making of this happy hour:  Color and I are one.  I am a painter." --- Paul Klee

"Colour is my day-long obsession, joy and torment." --  Claude Monet


If you need a burst of color in your life, check out the items for sale in my Etsy shop.

Friday, July 30, 2010

Fiber fantasy scarf: Fringe madness


I spent a couple of weeks sewing in preparation for a show, and I was excited to make more of the fiber fantasy scarves.  I had so much fun working with the recycled sari ribbons and yarns that I wanted to make another scarf using them. I had two main goals:  to create a diagonal line that avoided the typical vertical or horizontal layout of fibers and to create a more open, less dense feel for the scarf.  So I laid out the sari ribbon on the diagonal, looping it back and forth.  In between, I laid out recycled sari yarn and commercial yarns and ribbons, but without filling in the space fully. 

I used free-motion stitching to make stylized flames in red, orange, and yellow threads, and then used heavy gold metallic thread to stitch spirals along one long edge of the scarf.  The flame design doesn't really show up on the scarf, but the gold metallic shows up nicely.  If I want the stitching to show up on these scarves, I need to use heavy-weight thread in a contrasting color -- otherwise, the thread blends into the other fibers of the scarf. 

I used a different water-soluble stabilizer for this scarf (Aquabond).  I found the adhesive to be a bit weaker, but it rinsed out more easily than the Aqua-Magic I had used previously, which tends to leave behind adhesive residue.  After rinsing out the stabilizer,  I had to untangle the fringe (which was quite a task).  Then I trimmed the fringe and hand-knotted it on all four sides of the scarf.  This took a long time, but turned out to be a good task to keep me from being antsy while waiting for a doctor's appointment. 

Overall, I'm pleased with how this turned out.  The colors are fabulous -- the recycled sari ribbon and yarn really has intense, luscious color -- and I think the fringe gives it nice movement.  It's a long scarf (about 6" wide and 54" long), which means it can be worn in quite a few different ways.  At the show, this scarf attracted attention -- a number of people touched it, picked it up, tried it on.  Seems like a sign of a successful design to me!  The scarf is for sale in my Etsy shop

Sunday, March 7, 2010

Mud cloth vest: How long did it take you?

Vest back
Vest front, collar turned down 

My latest wearable creation is a cross-cultural fusion, representing the global marketplace at its best.  I used the pattern for a traditional Tibetan panel coat from Folkwear, with the outside panels from handwoven mud cloth from Mali and commercial black linen fabric, which were then embellished with batik-dyed bone beads from Kenya and cowrie shells.  The vest is lined with a cotton print that has a hand-dyed look and cream-colored linen fabric.  The facings are in a wine-colored linen fabric.  I can see that this is yet another example of my penchant for wearing costumes


Back of vest, half-beaded. 
See the difference the beading made?
 
Vest front, half-beaded 
The beading made a huge difference in this piece. Before the shoulder pieces were beaded, the vest wasn't particularly flattering. The visual weight took the eye downward, toward the wider part of the panels. I tried out a couple of different fabrics for the shoulder pieces, but none of the colors looked right. (I don't have much in the way of earthtones in my fabric stash.) In the end, I went with a heavier-weight black fabric (cotton? silk? I'm not sure). This helped support the shoulder line of the garment, but didn't create much visual contrast with the rest of the vest. Once I sewed the bone beads and cowrie shells on the shoulder pieces, the shoulders gained greater visual weight and looked wider, creating more balance with the width of the bottom of the vest. I also like the way that the batik-dyed bone beads blur the line between the black and white spiral mud cloth piece and the shoulder piece.
Vest back, detail of beading


Vest, front left shoulder, detail of beading 


Vest, left side
I knew I wanted to put the spiral bone beads under the arm to connect with the spiral mud cloth fabric of the front panels.  I also wanted some more cowrie shells, and I figured putting them underneath the spiral beads would camouflage the slight puckering of the linen fabric underneath the shoulder accent piece.  This ended up becoming a line of cowrie shell and spiral bead fringe, which has a lovely movement and sound as the shells bump into each other.  As a happy coincidence, this creates a visual line at the waist, which is flattering, particularly in a loosely fitting garment like this.  Who knew? 

Armhole, beading detail


This vest is a great example of why I have trouble answering the question, "How long did it take you to make that?"  First of all, I don't keep track of my hours in any precise way when I am involved in a lengthy project.  Second, I tend to work on multiple projects simultaneously, and I may put aside one project for months (or even years) before getting back to it.  This tends to happen when I hit a snag in the design or construction process.  
Vest front, opened to show lining
I started making this vest a year ago.  It took me a day or two to cut out the pattern pieces; this process was complicated by the fact that I was trying to maximize the visual impact of the mud cloth design from three separate pieces of mud cloth.  There were a few places where the weave needed to be reinforced, so I backed those sections with a piece of cotton fabric, using fusible web. I also had a hard time finding a lining fabric, as I have little in my fabric collection that fits with the muted earthtones of the mudcloth, so there was some hunting and pondering time in there.  I don't remember how long it took me to sew the panels together, but I put in extra time serging the raw edges of the fabric to keep the handwoven fabric from raveling.  Unfortunately, just as I was serging the last seam on the lining, I ended up cutting into the fabric.  Argh!  This kind of snag is what usually makes me put the project aside until I feel ready to deal with it again. 

Closeup of patch on lining
What with my work schedule and other projects, I didn't get back to this vest until a month ago.  I've been on a mission to finish up my works-in-progress, so I pulled this project out as the next to be completed.  I decided to put a patch on the cut section of the lining fabric, so I had to hunt through my stash again to find a complementary fabric.  The cotton print with cowrie shells seemed perfect, so I fussy-cut a patch and fused it onto the lining, using a decorative stitch to anchor it.  It actually looked neat, kind of like a postage stamp or a designer label.  In fact, I liked it so much that I was sorry to see it partly covered by the facing.  It's nice when a mistake turns into a design feature. 

The next challenge was basting the outer layer and the lining together.  The outer layer had stretched quite a bit more than the lining, and I ended up basting, ripping out the basting, and re-basting, which took quite a bit of time as it was all done by hand.  Once that was fitted together, it was time to do the facings and the neckband, which I hand-basted, machine stitched, and then hand-tacked to the lining.  The facings and neckband alone took several days to complete, largely due to the hand-stitching.  It helped that we were snowed in, so I had a week to work on the vest (between bouts of shoveling snow, that is). 
Auditioning beads       
Then I auditioned various possible shoulder fabrics in between sewing cowrie shells by hand on the neckband.  I finally chose the black fabric and hand-stitched the shoulder pieces in place.  It was clear that it needed more beading, so I tried out various bead arrangements (more pondering time here).  After deciding on the bead design, it was just hours and hours (and hours!) of hand sewing the beads and then the whole garment was finally complete. 

I could, of course, try to estimate all the time involved in the design, construction, and embellishment of the vest.  But that isn't even the whole story.  Really, this vest began a decade ago, when I first had the idea of making a panel coat from mud cloth, and I began my search for the fabric and beads.  I got gorgeous pieces of mud cloth from African import stores in Georgetown and purchased bone beads in Dupont Circle and Adams Morgan (neighborhoods in Washington, DC).  I searched online for cowrie shells of the right size and color -- I only found the ones I used here quite recently.  Or maybe the story really began twenty years ago, when I made a Tibetan panel coat for my sister and dreamed of having one of my own (I probably should have kept that one and given her something she would have liked better -- I doubt she got much use out of it).  How do we count the hours of imagination and dreaming and looking for supplies?  

This is why I never know how to answer the question, "How long did it take you to make that?" except to say . . . "A long time."